
 Hola sweethearts today’s post is the first post on WATER MARBLE NAIL ART its basically a marble art done with water, i did mine in purple.
Im not so perfect at this but i believe after one or two more attempts ill be just fine. Keep on reading If you want to know how the nail art in the picture above is achieved.
What you need

1) A small cup filled with luke warm water (i used the cover of a Nestle table water bottle)
2) A large needle/pin
3) Sellotape
4) The nail polish (from 3-5 shades)
 ( i used, Sally Hansen deep purple, breezy blue& flirt)
Steps

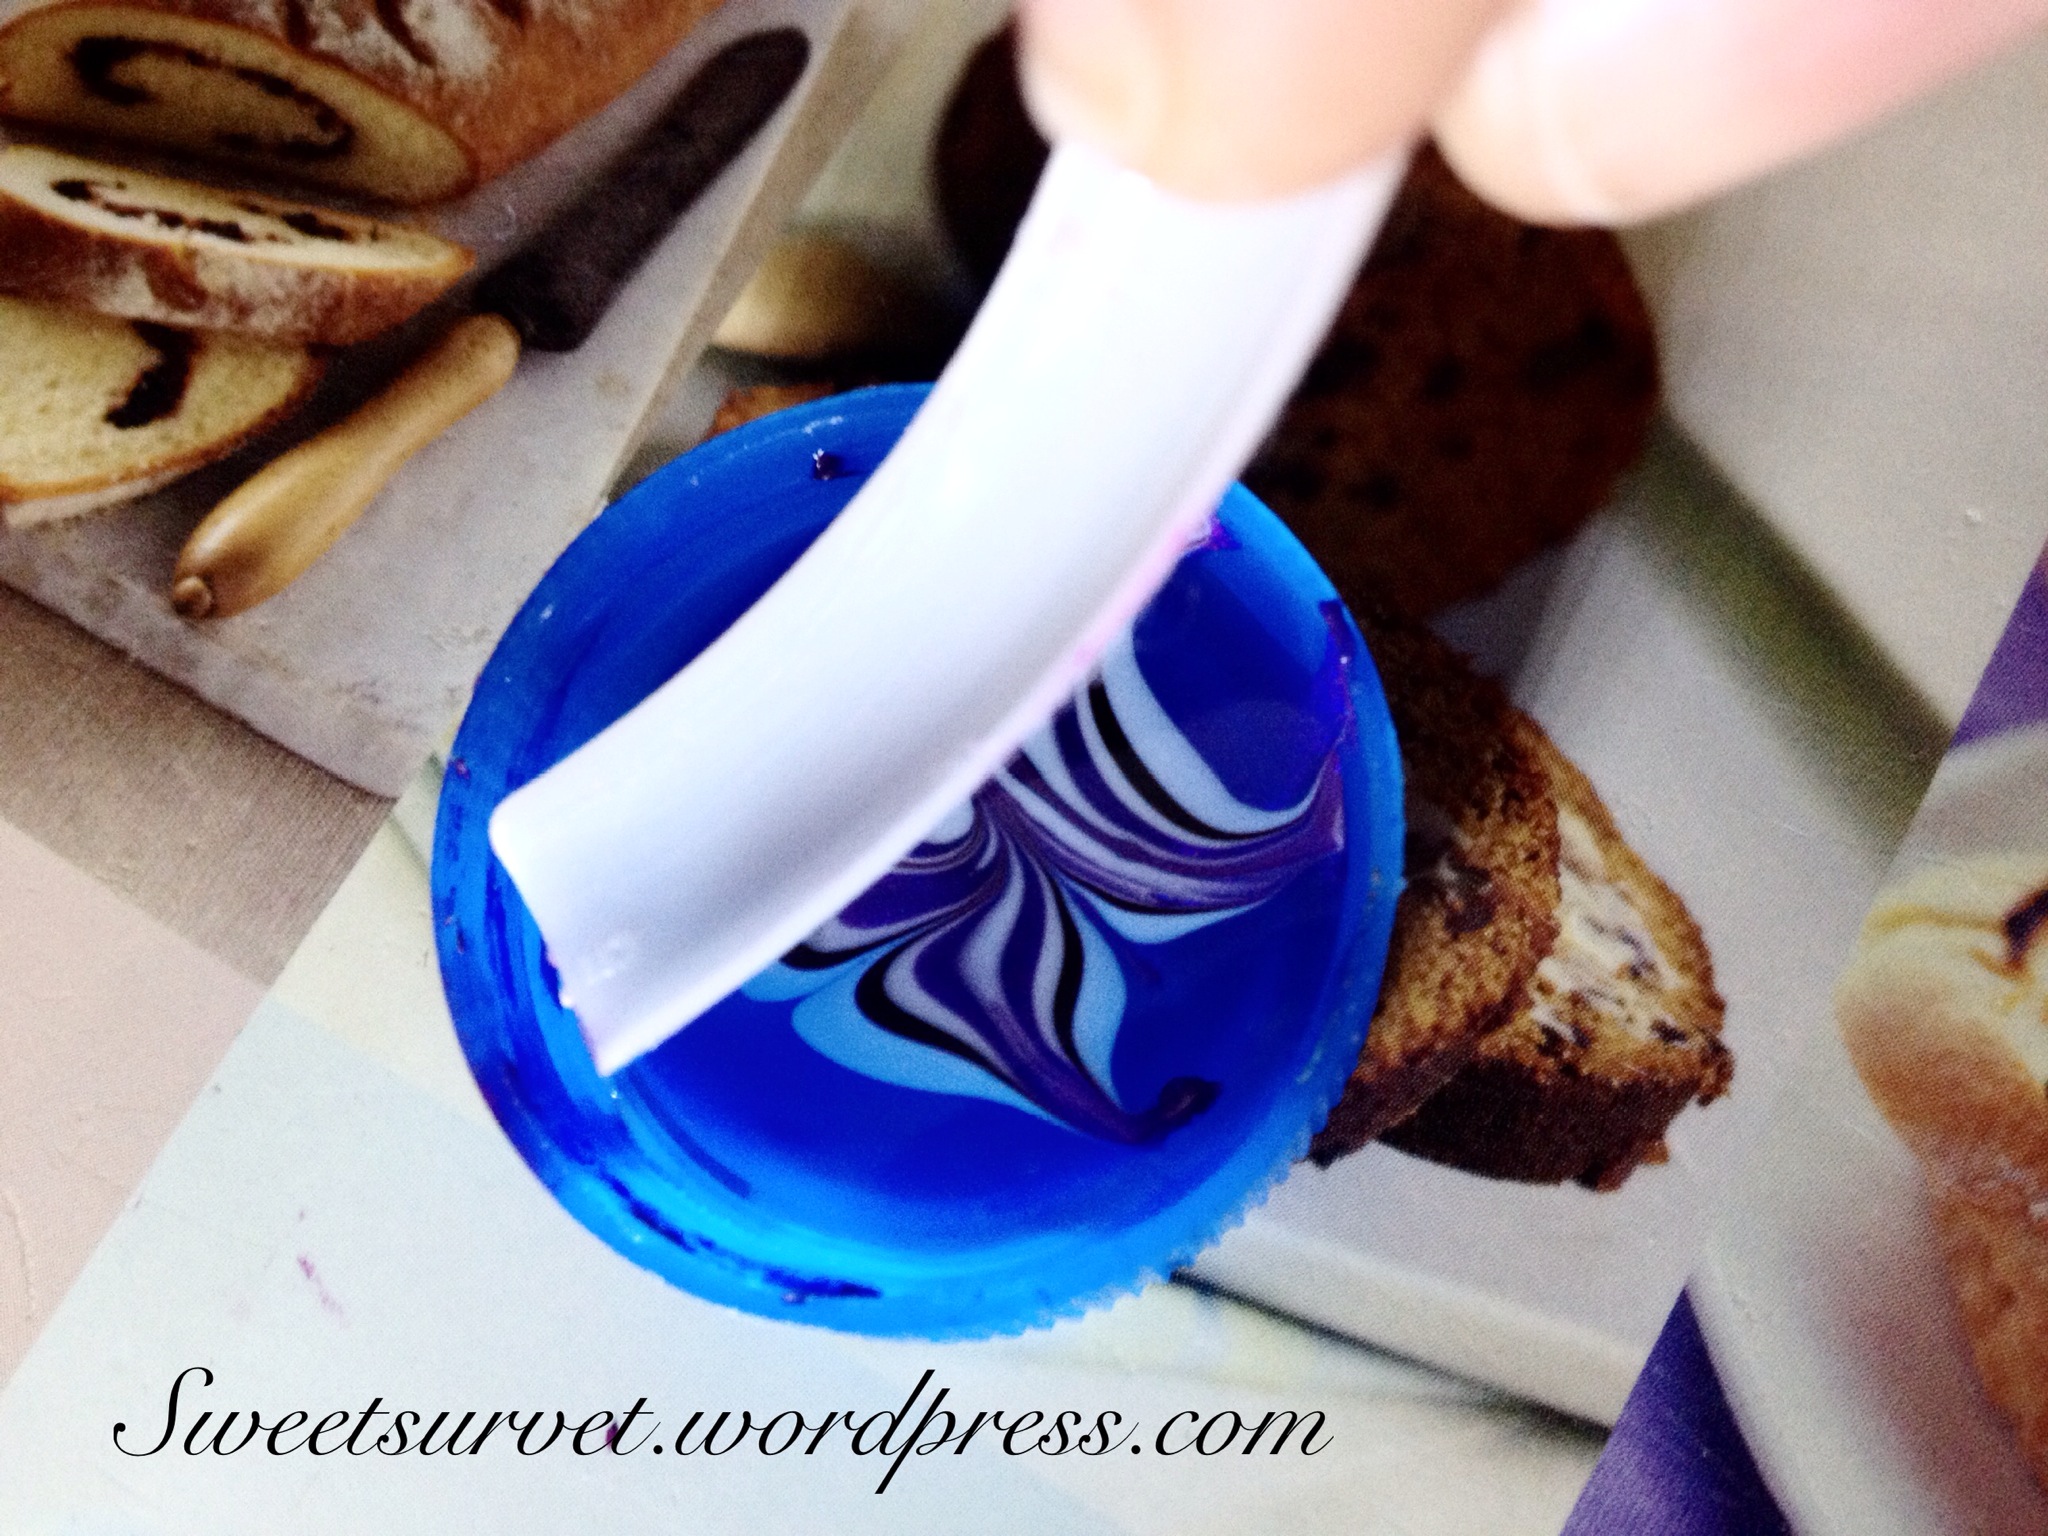
Using a dark shade first, place a drop of the polish in the water (it spreads out fast and floats), take a lighter shade and place in the middle of the previous colour, take a darker shade and place in the middle (they will all spread out forming what it looks like in the image above, repeat the same step till you get to the Centre and there isn’t any more space for drops (note: you have to be quick as it tends to dry out fast).
 once you are done with the circles, you immediately use the needle to draw out the design you want ( you drag the floating acrylic polish outwards and inwards till you get a desired pattern) then you dip in your nail (finger) also remember you must cover all the parts of your skin around your nail with the tape leaving only your nail exposed.
 when you dip your nail upside down in the water, you drag out any polish floating around with the needle and gently remove your nail. Leave to dry and remove the Sellotape and tadah!!! You have this
 you can dip more than one finger if you make use of a cup or wider lid, you can also apply a base coat before dipping or not (either way its good) base coat options are (white, a light shade of the theme you are going for, black or the darkest shade of the theme you are going) apply a top coat (clear polish) for a shine and smooth finish. For a less dramatic and mild effect, you can make the middle finger or ring finger the marble art while the other fingers will be a cute plain shade from the theme.
 different designs produce different results so feel free to explore swirls and drags and also colours like lemon green , shades of green pink magenta , orange and yellow, black and white and the list is endless.


 and thats your lovely and easy marble nail art using water. More marble art series are coming up where ill try variations and colour blocking, rainbow and also i might make use of acrylic nails for the tutorial ( thats just because i don’t have wide nails) so the design will show more but its not necessary.
Thankss for viewing, i hope this post was explained well. Follow for more coming up and if you dint get any stage, feel free to ask in the comment box and make sure you have a wonderful week xx
-Liz

This is a beautiful work, lovey blog and sweet person. Keep it up my dear. From Nina
LikeLike
Thank you
LikeLike
wow…this is dope! pls can it be done on my finger nails as in not on artificial nails?
LikeLike
Yes dear it can, i used my natural nails
LikeLike